User Guide
Contents
Notice
The Total Compute 2022 (TC2) software stack uses bash scripts to build a Board Support Package (BSP) and a choice of Buildroot Linux distribution or Android userspace.
Prerequisites
- These instructions assume that:
Your host PC is running a recent Ubuntu Linux (18.04, 20.04 or 22.04)
You are running the provided scripts in a
bashshell environment.
To get the latest repo tool from google, run the following commands:
mkdir -p ~/bin
curl https://storage.googleapis.com/git-repo-downloads/repo > ~/bin/repo
chmod a+x ~/bin/repo
export PATH=~/bin:$PATH
- If syncing and building android, the minimum requirements for the host machine can be found at https://source.android.com/setup/build/requirements, These include:
At least 250GB of free disk space to check out the code and an extra 150 GB to build it. If you conduct multiple builds, you need additional space.
At least 32 GB of available RAM/swap.
Git configured properly using “git config” otherwise it may throw error while fetching the code.
The software requirements can be automatically installed by running
requirements.sh with sudo, once the code is synced. They can also be
installed by running the following steps:
(Note: Python modules will be installed in a virtual environment)
To install the required packages, run:
sudo apt install -y chrpath gawk texinfo diffstat wget git unzip gcc-arm-linux-gnueabihf \
build-essential socat cpio python3 python3-pip python3-pexpect xz-utils debianutils \
iputils-ping python3-git libegl1-mesa libsdl1.2-dev xterm git-lfs openssl \
curl lib32ncurses5-dev libz-dev u-boot-tools m4 zip liblz4-tool zstd make \
dwarves ninja-build libssl-dev srecord libelf-dev bison flex
For Ubuntu 18.04:
sudo apt install pylint3 python-pip python
For ubuntu 20.04 and higher:
sudo apt install pylint python
Syncing and building the source code
There are two distros supported in the TC2 software stack: buildroot (a minimal distro containing busybox) and android.
Syncing code
Create a new folder that will be your workspace, which will henceforth be referred to as <tc2_workspace>
in these instructions.
mkdir <tc2_workspace>
cd <tc2_workspace>
export TC2_RELEASE=refs/tags/TC2-2022.08.12
To sync BSP only without Android, run the following repo command:
repo init -u https://gitlab.arm.com/arm-reference-solutions/arm-reference-solutions-manifest -m tc2.xml -b ${TC2_RELEASE} -g bsp
repo sync -j `nproc` --fetch-submodules
To sync both the BSP and Android, run the following repo command:
repo init -u https://gitlab.arm.com/arm-reference-solutions/arm-reference-solutions-manifest -m tc2.xml -b ${TC2_RELEASE} -g android
repo sync -j `nproc` --fetch-submodules
The resulting files will have the following structure: - build-scripts/: the components build scripts - run-scripts/: scripts to run the FVP - src/: each component’s git repository
Initial Setup
NOTE: python cryptography module is needed, but might be already installed as an apt package in an older version. If this is the case, run:
sudo apt remove python3-cryptography
To patch the components and install the toolchains and build tools, navigate to the build-scripts directory, then run: For buildroot build:
export PLATFORM=tc2
export FILESYSTEM=buildroot
./setup.sh
For an Android build:
export PLATFORM=tc2
export FILESYSTEM=android-swr
./setup.sh
The various tools will be installed in the tools/ directory at the root of the workspace.
To build Android with AVB (Android Verified Boot) enabled, run:
export AVB=true
NOTES:
If running
repo syncagain is needed at some point, then the setup.sh script also needs to be run again, as repo sync can discard the patches.Most builds will be done in parallel using all the available cores by default. To change this number, run
export PARALLELISM=<no of cores>
Board Support Package build
To build the whole stack, simply run:
./build-all.sh build
Build files are stored in build-scripts/output/tmp_build/, final images will be placed in build-script/output/deploy/.
More about the build system
build-all.sh will build all the components, but each component has its own script, allowing it to be built, cleaned and deployed separately.
All scripts support the build, clean, deploy, patch commands. build-all.sh also supports all, to clean then rebuild all the stack.
For example, to build, deploy, and clean SCP, run:
./build-scp.sh build
./build-scp.sh deploy
./build-scp.sh clean
The platform and filesystem used should be defined as described previously, but they can also be specified like so:
./build-all -p $PLATFORM -f $FILESYSTEM build
Additionally, Android Verified Boot (AVB) can be enabled with the -a option.
Those options work for all the build-*.sh scripts.
Android OS build
tc2_swr : This supports Android display with swiftshader (software rendering).
The android images can be built with or without authentication enabled using Android Verified Boot(AVB). AVB build is done in userdebug mode and takes a longer time to boot as the images are verified.
The -a option does not influence the way the system boots rather it adds an optional sanity check on the prerequisite images.
Android based stack takes considerable time to build, so start the build and go grab a cup of coffee!
Provided components
Firmware Components
Trusted Firmware-A
Based on Trusted Firmware-A
Script |
<tc2_workspace>/build-scripts/build-tfa.sh |
Files |
|
System Control Processor (SCP)
Based on SCP Firmware
Script |
<tc2_workspace>/build-scripts/build-scp.sh |
Files |
|
U-Boot
Based on U-Boot gitlab
Script |
<tc2_workspace>/build-scripts/build-u-boot.sh |
Files |
|
Hafnium
Based on Hafnium
Script |
<tc2_workspace>/build-scripts/build-hafnium.sh |
Files |
|
OP-TEE
Based on OP-TEE
Script |
<tc2_workspace>/build-scripts/build-optee-os.sh |
Files |
|
S-EL0 trusted-services
Based on Trusted Services
Script |
<tc2_workspace>/build-scripts/build-trusted-services.sh |
Files |
|
Linux
The component responsible for building a 5.10 version of the Android Common kernel (ACK).
Script |
<tc2_workspace>/build-scripts/build-linux.sh |
Files |
|
Trusty
Based on Trusty
Script |
<tc2_workspace>/build-scripts/build-trusty.sh |
Files |
|
Distributions
Buildroot Linux distro
The layer is based on the buildroot Linux distribution. The provided distribution is based on BusyBox and built using glibc.
Script |
<tc2_workspace>/build-scripts/build-buildroot.sh |
Files |
|
Android
Script |
<tc2_workspace>/build-scripts/build-android.sh |
Files |
|
Run scripts
Within the <tc2_workspace>/run-scripts/ are several convenience functions for testing the software
stack. Usage descriptions for the various scripts are provided in the following sections.
Obtaining the TC2 FVP
The TC2 FVP is available to partners for build and run on Linux host environments. Please contact Arm to have access (support@arm.com).
Running the software on FVP
A Fixed Virtual Platform (FVP) of the TC2 platform must be available to run the included run scripts.
The run-scripts structure is as follows:
run-scripts
|--tc2
   |--run_model.sh
   |-- ...
Ensure that all dependencies are met by running the FVP: ./path/to/FVP_TC2. You should see
the FVP launch, presenting a graphical interface showing information about the current state of the FVP.
The run_model.sh script in <tc2_workspace>/bsp/run-scripts/tc2 will launch the FVP, providing
the previously built images as arguments. Run the run_model.sh script:
./run_model.sh
Incorrect script use, call script as:
<path_to_run_model.sh> [OPTIONS]
OPTIONS:
-m, --model                      path to model
-d, --distro                     distro version, values supported [buildroot, android-swr]
-a, --avb                        [OPTIONAL] avb boot, values supported [true, false], DEFAULT: false
-t, --tap-interface              [OPTIONAL] enable TAP interface
-e, --extra-model-params         [OPTIONAL] extra model parameters
Running Buildroot
./run-scripts/tc2/run_model.sh -m <model binary path> -d buildroot
Running Android
For running android with AVB disabled:
  ./run-scripts/tc2/run_model.sh -m <model binary path> -d android-swr

For running android with AVB enabled:
  ./run-scripts/tc2/run_model.sh -m <model binary path> -d android-swr -a true
When the script is run, three terminal instances will be launched. terminal_uart_ap used for TF-M firmware logs, terminal_s0 used for the SCP, TF-A, OP-TEE core logs and terminal_s1 used by TF-A early boot, Hafnium, U-boot and Linux.
Once the FVP is running, hardware Root of Trust will verify AP and SCP images, initialize various crypto services and then handover execution to the SCP. SCP will bring the AP out of reset. The AP will start booting from its ROM and then proceed to boot Trusted Firmware-A, Hafnium, Secure Partitions (OP-TEE, Trusted Services in Buildroot and Trusty in Android) then U-Boot, and then Linux and Buildroot/Android.
When booting Buildroot the model will boot Linux and present a login prompt on terminal_s1. Login
using the username root. You may need to hit Enter for the prompt to appear.
The OP-TEE and Trusted Services are initialized in Buildroot distribution. The functionality of OP-TEE and
core set of trusted services such as Crypto and Internal Trusted Storage can be invoked only on Builroot distribution.
For OP-TEE, the TEE sanity test suite can be run using command xtest on terminal_s1.
For Trusted Services, run command ts-service-test -sg ItsServiceTests -sg PsaCryptoApiTests -sg
CryptoServicePackedcTests -sg CryptoServiceProtobufTests -sg CryptoServiceLimitTests -v for Service API level tests
and run command ts-demo for the demonstration client application.
On Android distribution, Trusty provides a Trusted Execution Environment (TEE).
The functionality of Trusty IPC can be tested using command tipc-test -t ta2ta-ipc with root privilege.
(Once Android boots to prompt, do su 0 for root access)
While booting, GUI window - Fast Models - Total Compute 2 DP0 shows Android logo and on boot completion,
the window will show the Android home screen.
On Android distribution, Virtualization service provides support to run Microdroid based pVM (Protected VM). For running a demo Microdroid, boot TC FVP with Android distribution. Once the Android is completely up, run below command:
./run-scripts/tc2/run_microdroid_demo.sh
Debugging on Arm Development Studio
Creating a new connection
File->new->model connection
Name it and next
Add a new model and select CADI interface
Select
Launch and select a specific modelGive TC2 FVP model path and Finish
Close
Attach and Debug
Build the target with debug enabled.
build-scripts/configcan be configured to enable debug.Run Buildroot/Android as described above.
Select the target created as mentioned in
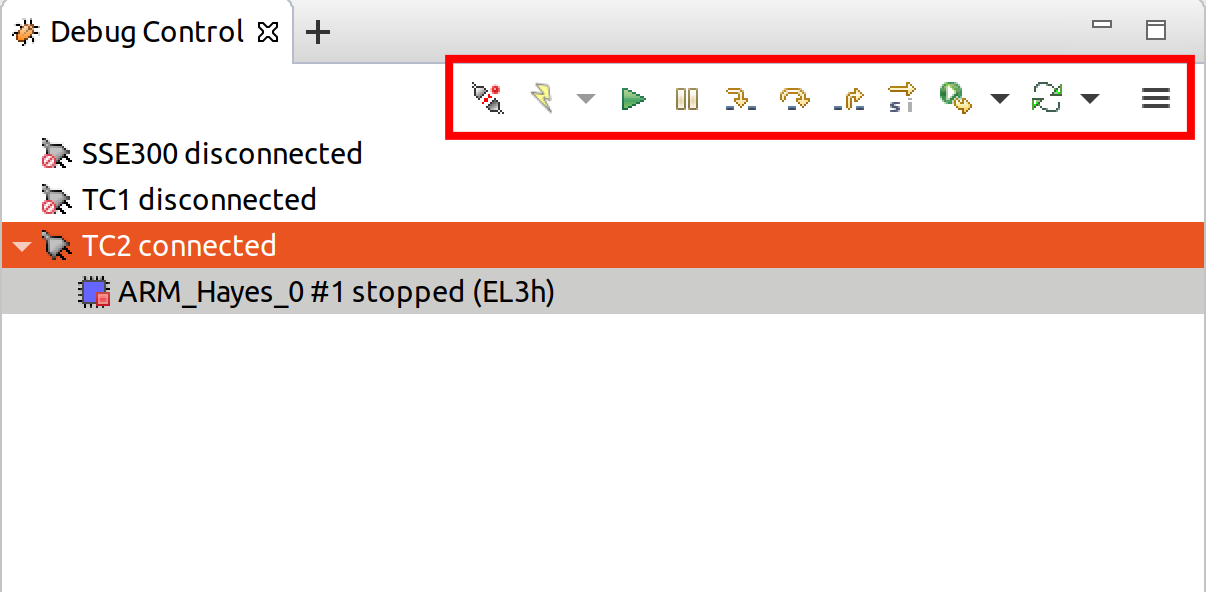
Creating a new connectionandconnect to targetfrom debug control console.After connection, use options in debug control console (highlighted in the below diagram) or keyboard shortcuts to
step,runorhalt.To add debug symbols, right click on target ->
Debug configurationsand underfilestab add path toelffiles.Debug options such as
break points,variable watch,memory viewand so on can be used.

Switch between SCP and AP
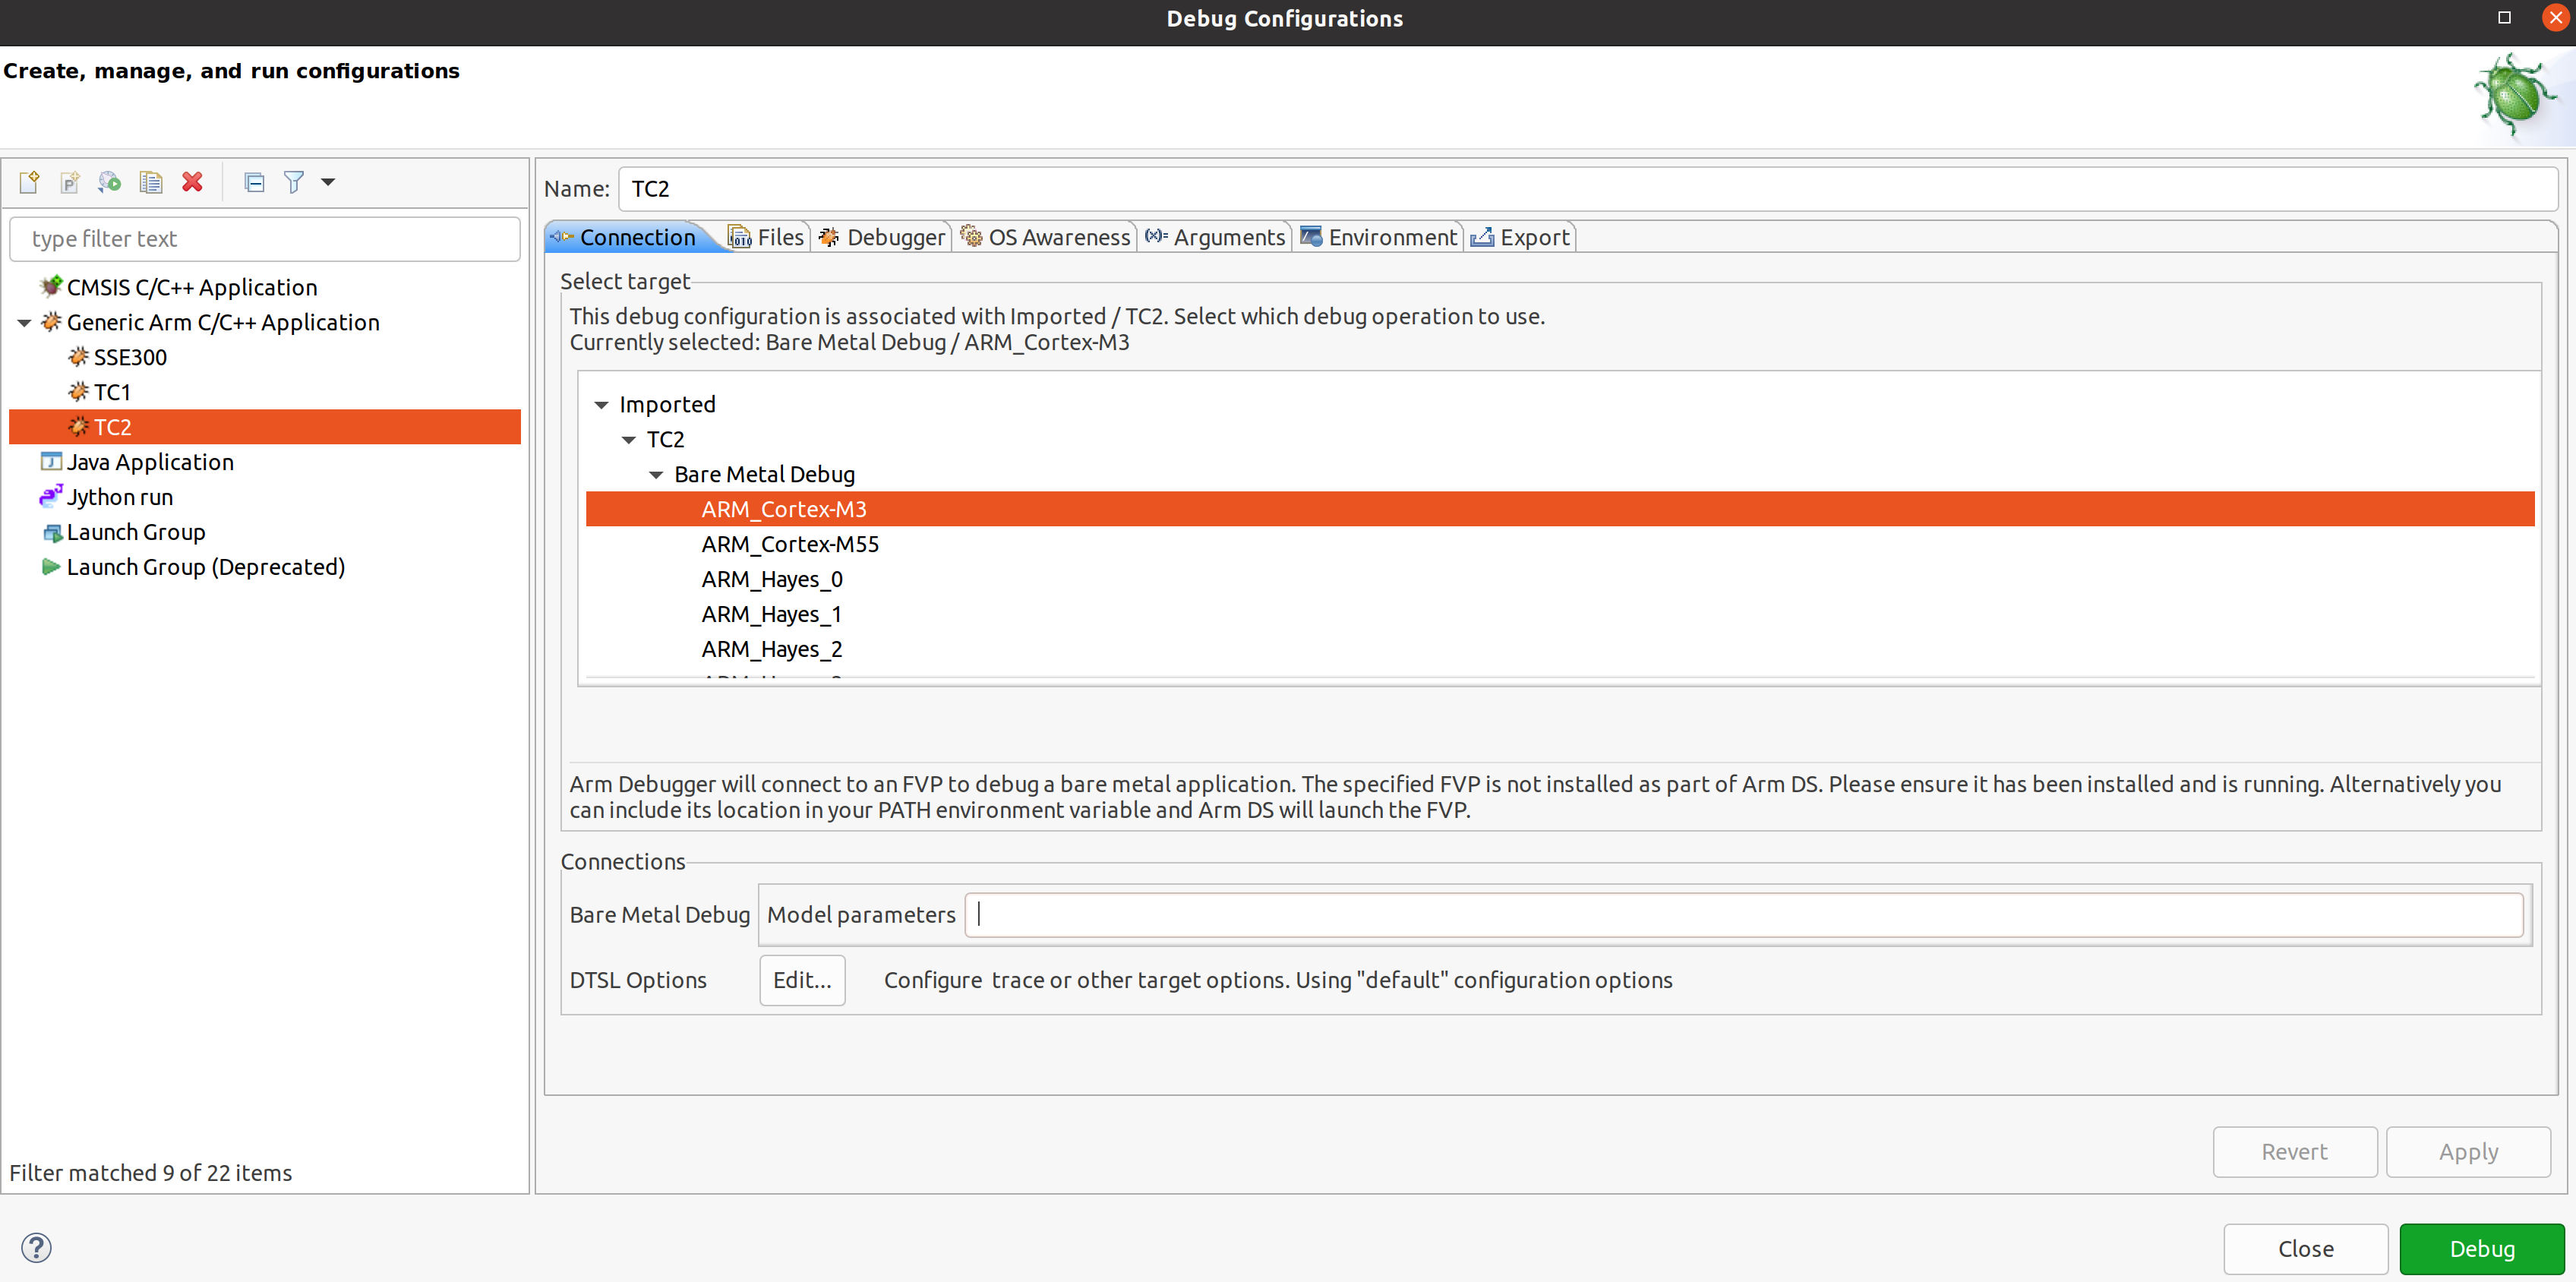
Right click on target and select
Debug ConfigurationsUnder
Connection, selectCortex-M3for SCP andArm-Hayes_x/Arm-Hunter_xfor AP core x and then debug

Copyright (c) 2022, Arm Limited. All rights reserved.